You need to sign in with a valid username/password to create an event. As the creator of an event, you may be performing either of these roles:
- The Scheduler with specific security permissions to save the event to the database and assign/request locations and resources
OR
- The Requestor with limited permissions to complete the event can expect, for example, that location and resource assignments (and the event itself) might be submitted to others for completion
Security Note
System security determines whether you can create or request events. In addition, if your user does not have permission to view Contacts, the default scheduler for a location or resource may not display. Ask your system administrator if you're unable to perform any functions you think should be available to you.
Accessing the Online Event Form
Take one of the following actions to start creating an event:
 Image: Use the Event Form link in the top navigation bar to start creating an event. Image: Use the Event Form link in the top navigation bar to start creating an event.OR
OR
OR
OR
OR |
 Image: The 25Live Event Form is also available on mobile devices and the 25Live mobile app. |
 icon in a
 - Use the Create an Event in this Location option in the More Actions menu when Viewing Location Details
- Use the Create an Event that uses this Resource option in the More Actions menu when Viewing Resource Details
Stepping Through the Event Form
Note: Your Instance May Differ
Your event creation environment may not include all the sections and fields mentioned below, depending on how 25Live has been set up for your instance and security group.
Administrators may see a dropdown option to Select any Config. This allows switching between the different configurations set up in System Settings to display alternative fields, instructions, and so on.
In addition, views on the 25Live mobile application differ at times.
Security Tip: Switching Configurations With Permission
If you have permission, you may see a Select Form Configuration dropdown menu that lets you view different Event Form configurations. If you wish to turn off this ability for yourself or any other user, adjust the following setting in the Series25 Group Administration tool:
Administrative: 20.0 View Event Creation and Editing Configurations
1. Enter Basic Information
Enter an Event Name, Event Title, select an Event Type, and complete the Primary Organization. If any of these fields are required, they are labeled as such.
- Web calendars (if set up for your 25Live instance) and searches display the Event Name.
- Permissions determine which Event Types you can choose from. Your chosen Event Type determines some options that appear later in the form.
- Some fields in this section search ahead as you type in them.
 Image: Required fields are labeled on the Event Form. |
 Image: Event form on 25Live mobile application. Image: Event form on 25Live mobile application. |
You can Edit or remove the Primary Organization or Secondary Organization if displayed. If you cannot find the right organization, use the Create Organization button/link if you have security permissions to do so. A warning may appear if an organization's rating has restrictions. An organization rating may also prevent an event from being submitted.
Tip: The Information Icon
Use the information ![]() icon to view additional help and/or instructions for any field that displays it. Some help sections may be open by default for reading, depending on your instance and configuration.
icon to view additional help and/or instructions for any field that displays it. Some help sections may be open by default for reading, depending on your instance and configuration.
2. Enter Attendance Information and Description
- Expected Head Count
- Registered Head Count
- 25Live can use the expected or registered head count to find locations that can hold your event.
- Event Description
- The Event Description can appear on web calendars if you intend to publish your event.
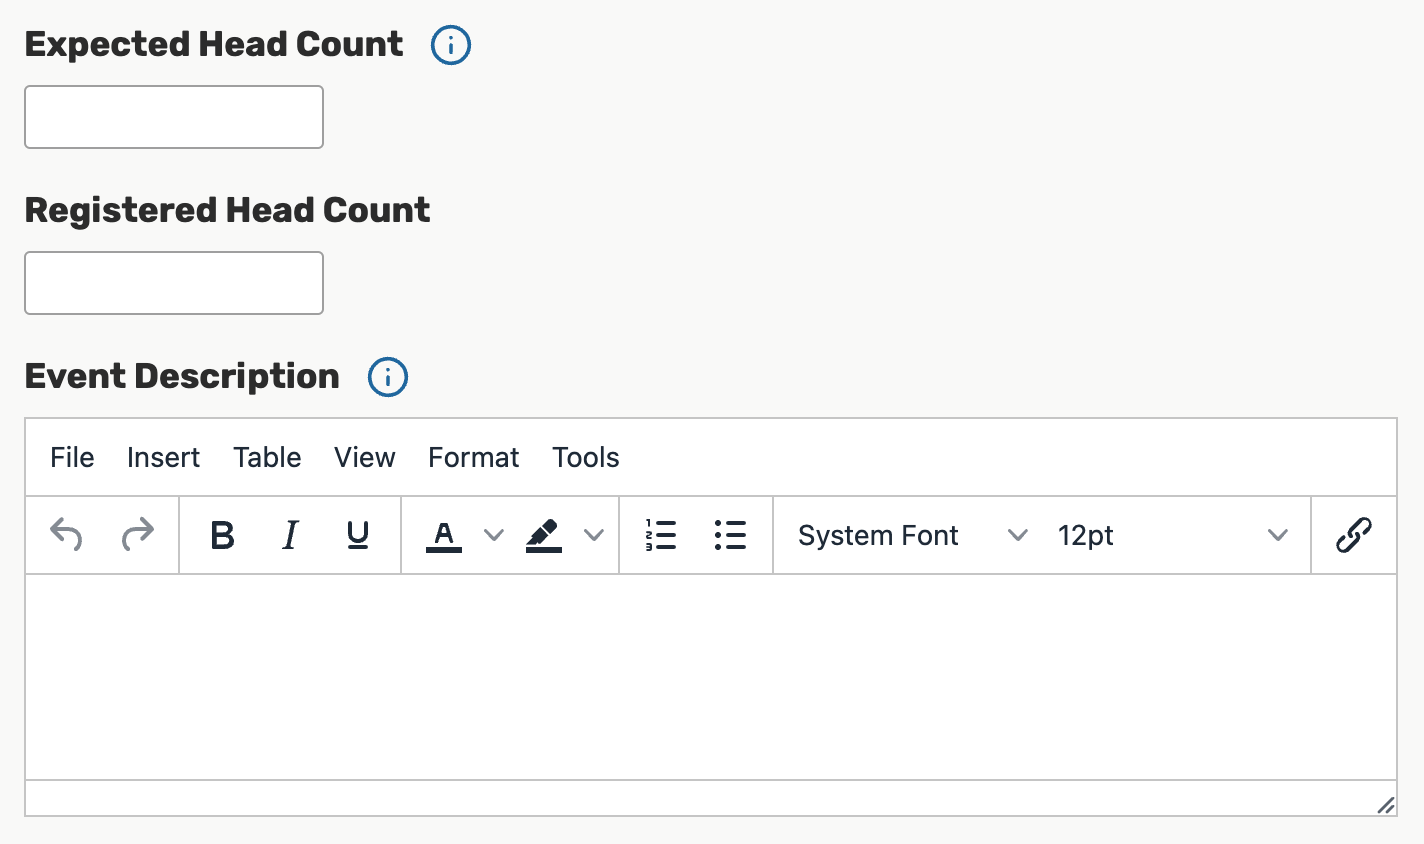 Image: The Event Description field allows you to format text with a variety of options.
- The Event Description can appear on web calendars if you intend to publish your event.


Tip: In a Browser, Use the Left Side Navigation to Move Around
The Event Form features convenient side navigation to the left of the sections and fields.
 Image: Use the navigation along the left side of the screen to move between sections of the Event Form.
3. Enter Date/Time Information About Your Event’s First Occurrence
Specify the date and times of the first occurrence of the event. If your event occurs on multiple days, you’ll describe how it repeats in the next section.
 Image: Event Date and Time fields.
- All Day- If checked, will set the event to take place over the entire day. Start and end time fields will be hidden.
- Note: This option will only display if Show All Day Toggle is set to Yes in the security group's event form configurations.
- This event begins and ends on the same day - When checked, this option will create a single occurrence of a multi-day event.
- When the box is unchecked, you can choose an End Date; however, be aware that if this is a repeating event, every subsequent occurrence will have the same multi-day duration.
 Image: Use the Additional Time section to add extra time to events
Tip: Added Additional Time is Indicated by the Icon
When editing an event, before you use the arrow icon to expand the Additional Time section, you can see if any additional time has already been saved for the event by looking at the bookmark icon (![]() ) to see if it’s filled in.
) to see if it’s filled in.
 Image: Additional Time added is indicated by the icon next to the section title.
If the event requires Setup/Pre-Event and/or Post-Event/Takedown time, fill in times for the number of days, hours, or minutes needed. The Event Form displays the Event Duration as well as the total Reservation Duration if you add additional time. See Adding Additional Time to Events.
Security Note
System configuration and security determine whether you can use Setup, Pre-Event, Post-Event, and Takedown times for events. Ask your 25Live administrator if you're unable to perform functions you think should be available to you.
4. Optionally Choose How Your Event Repeats
If your event has more than one occurrence, select how the event repeats. 25Live allows you to create repeating events defined as either ad hoc/random dates or as a pattern (daily, weekly, or monthly).
- Tap or click on dates on the calendar to create random (or ad hoc) repeat occurrences
- You can also add additional, random dates after selecting and defining a pattern
- Or use the Repeating Pattern button to select the pattern type (including ad hoc dates) and complete its options, then use the Select Pattern button to save your choices
See Creating Repeating Events for details.
 Image: Choosing the repeat pattern for your event determines additional options. |
 Image: Date pattern picker on 25Live mobile application. Image: Date pattern picker on 25Live mobile application. |
If you need to remove all repeat occurrences, use the Repeating Pattern button, then choose Does Not Repeat.
Manage Occurrences
 Animation: Select the Manage Occurrences button to view dates, times, states, locations, and resources. |
 Image: Editing date occurrences on mobile app. Image: Editing date occurrences on mobile app. |
- Include Only Missing Locations - View only occurrences that don't have locations requested or reserved
- Include Only Missing Resources - View only occurrences that don't have resources requested or reserved
- View Included - View only occurrences that are marked to include in location and resource searches
- By unchecking the Include In Search checkboxes in the list of occurrences, you can remove an occurrence from your location search to help find locations without conflicts for that date and time
- View All - to return to the default view that shows all event occurrences
- Add Occurrence
This view also gives you options for:
- Adjusting occurrence Times
- Adding a Comment to each occurrence
- Changing the State to Active or Cancelled
- Removing individual Locations and Resources from an occurrence
- Using the Remove button for occurrences
5. Select Location(s)
Tip: Location and Resource Sections Can Collapse
To help you view information more efficiently, you can expand or collapse the Location and Resource sections.
 Animation: Viewing occurrences that are missing locations or resources.
You can choose whether to Auto-Load Starred searches or not. It's often easier to start with a Saved Search, or you can perform a search for suitable locations by location name.
- If performing a keyword search, use the Search Filters dropdown to add additional search parameters, such as Categories, Features, Layouts, and Capacity
- Check the Hide Locations with Conflicts or Enforce Headcountboxes to narrow the results
- These options are checked by default and will remember your setting to check or uncheck them
- To use SeriesQL for an advanced search, start typing two colons::
- Buildings are available to filter when looking for locations
As you search, 25Live checks for the availability of location(s) at your specified dates/times.
Tip: If You Don't See Your Desired Location
The location may have an assignment window configured for it in the Series25 Group Administration tool that enforces a specific period of time before which you must request a location ahead of time.
- Use the Conflict Details link to view more information about location conflicts
- The links on location names allow you to view location details
 Image: Use the checkboxes above the search options to narrow results. |
 Image: Location search on 25Live mobile app. Image: Location search on 25Live mobile app. |
If a location is available to Reserve, a green button is displayed. For locations that need extra approvals or permissions, such as ones that can only be requested or have conflicts, an olive-colored button displays. You may choose one or more available locations for your event. A selected location appears as a pending assignment in event details and in the location availability grid until you save the event.
 Image: Event Form Locations Search showing a location with a conflict.
If there is a conflict for that location, you can use the Conflict Details link in the Conflict Details column of the Locations Search.
 Image: The Conflicts pop-up on the Event Form Locations search showing the events with conflicts for that location.
The conflicting events appear in the order of their Waitlist order. Clicking or tapping on the event name link takes you to that event's details page. If a user does not have permission to view a conflicting request event, the event is listed as Private.
Location Occurrence Editing
25Live allows you to adjust settings per occurrence for each requested or reserved location. After adding a location, the reserved/requested item appears below the search (which you can collapse). For events with a single occurrence, location details can be edited directly on the tile. For events with multiple occurrences, use the View Occurrences link to add instructions, specify layouts, and additional options.
 Image: Viewing the location occurrence. Note that the Preview button will only be visible if a layout image is available.
See Adjusting and Editing Individual Event Occurrences for more details.
 Image: Settings for location per occurrence.
If you would like to set different locations for different dates, you can select only the occurrences you want to include for each location. For example, if the event repeats every Tuesday, Wednesday, and Thursday, and you want to set a specific location for the Tuesday/Thursday occurrences, check only those dates, then use the Search button to reserve for just the selected dates.
Customization Note
Depending on how your 25Live environment has been configured, assigning a location to your event may automatically assign the "Location Scheduler" to the Scheduler contact role for the event, or a Default Scheduler may be assigned based on your security group. (The Location Scheduler is one of the fields available to edit inline in the Location Details view in 25Live.)
Your institution's business processes determine how you can proceed with submitting your event request when the event is auto-assigned to another scheduler. If your user does not have permissions to view Contacts, some roles may not display.
Ensuring All Occurrences Have Locations and Resources
 Image: A message displays when required locations and/or resources are missing from occurrences.
If the Event Form Configuration set up for your 25Live user requires a location and/or resource, you will need to set one for each event occurrence. If not, you may see a warning prompting you to do so.
Occurrences For Either Locations or Resources
Image: Viewing occurrences that are missing resources or locations.
You can include or exclude occurrences from your location and/or resource searches by opening the Manage Occurrences display in the event date and time section of the event form. You can also see the list of event occurrences with options to:
- Include Only Missing Locations - View only occurrences that don't have locations requested or reserved
- Include Only Missing Resources - View only occurrences that don't have resources requested or reserved
- View Included View only occurrences that are marked to include in location and resource searches.
- By unchecking the Include In Search checkboxes in the list of occurrences, you can remove an occurrence from your location search to help find locations without conflicts for that date and time
- View All - to return to the default view that shows all event occurrences
- Add Occurrence
This view also gives you options for:
- Adjusting occurrence Times
- Adding a Comment to each occurrence
- Changing the State to Active or Cancelled
- Removing individual Locations and Resources from an occurrence
- Remove occurrences
6. Select Resource(s)
You can choose whether to Auto-Load Starred searches or not. It's often easier to start with a Saved Search, or you can perform a search for suitable resources by name.
- If performing a keyword search, use the Search Filters dropdown to add additional search parameters, such as Categories
- To use SeriesQL for an advanced search, start typing two colons ::
- As you search for them, 25Live checks automatically for the availability of the resource(s) at your specified dates/times
- Use the Conflict Details link to view more information about resource conflicts
- The search may not be available if your administrator(s) have limited the resource choices based on the selected location(s) or other criteria
- Columns are also displayed for Stock Total and Availability
- The links on resource names allow you to view resource details
- If there is a resource that your user has "Not Requestable" permission on, and your event form configuration has the resources card hidden, then you may see an alert when saving.
 Image: Extra information about resources is shown in columns.
Use the green Reserve button (or olive-colored button for resources that need other approvals or permission) to make selections. You may choose one or more available resources for your event.
Note: Overlapping Resources
Dates: The application will restrict overlapping resource dates in order to ensure the clarity of which stock total is active.
Overbooking Resources Between Occurrences: If occurrences on the same event use a resource quantity that exceeds availability, a message will appear informing the event creator/editor to prevent overbooking.
 Image: Conflict message displays for overlapping resources exceeding availability.
For example, the user will see a conflict message if occurrences on the same event overlap and the quantity between the occurrences is greater than the available stock total.
Resource Occurrence Editing
25Live allows you to adjust settings per occurrence for each requested or reserved resource. After adding a resource, the reserved/requested item appears below the search (which you can collapse). For events with a single occurrence, resource details can be edited directly on the tile. For events with multiple occurrences, use the View Occurrences link in the resource block below to add instructions, adjust the quantity, and change occurrence information. A selected resource appears as a pending assignment in event details and in the resource availability grid until you save the event. See Adjusting and Editing Individual Event Occurrences.
 Image: There is a View Occurrences button on every requested/reserved location block. |
 Image: Viewing resources in 25Live app to edit occurrences. Image: Viewing resources in 25Live app to edit occurrences. |
 Image: Settings for resource per occurrence. |
 Image: Editing individual occurrences in 25Live app. Image: Editing individual occurrences in 25Live app. |
If you would like to set different resources for different dates, you can select only the occurrences you want to include for each resource. For example, if the event repeats every Tuesday, Wednesday, and Thursday, and you want to set a specific resource for the Tuesday/Thursday occurrences, check only those dates, then use the Search button to reserve for just the selected dates. See Adjusting and Editing Individual Event Occurrences.
7. Attach File(s)
If your institution has configured and allowed file attachments for events, use the Choose File button (  ) or Upload a file button (
  ) to optionally attach one or more files.
- You can attach up to 5 files
- Files may not exceed 25MB
- Allowed file types:
- PDF, TXT, RTF
- JPG, JPEG, PNG, GIF
- DOC, DOCX
- XSL, XSLX, CSV
- MSG
- PPT, PPTX
You may also use this section to remove previously attached files from the event. See Attaching Files to Events.
8. Enter Custom Attributes (If Displayed)
Select and enter values for any available custom attributes that are pertinent to your event. Custom attributes are different for each instance of 25Live. Use the No/Yes toggle(s) to add and complete any custom attributes.
 Image: Examples of common custom attributes.
Required items will display at the top of the list.
Note: Some Sections Need an Event Type to Display
If you do not see the Custom Attributes or Contact Roles sections, make sure you have selected an Event Type above. Additionally, some Event Types may not be configured to display these fields.
 Image: Some custom attributes can have discrete dropdown options to choose from.
Some custom attributes may provide a dropdown list of options to choose from. Administrators can define these choices. See Adding and Editing Custom Attributes and Defining Discrete Dropdown Options.
9. Select Contacts
 Image: You can change existing contacts in roles, remove unneeded contacts, or create new contacts.
Select the contacts associated with the event using the dropdown menus. To search, enter a few letters of the contact’s name, and select it when the full name displays. Contact fields for other roles defined for this event type may also be displayed. If a contact is no longer needed, use the Remove link.
You can also add a new contact by using the Create button ( ) or Create a New Contact link ( ).
10. Complete Categories, Requirements, Calendars, Comments, and Notes
 Image: Sections and fields for Categories, Requirements, Calendars, and Comments depend on how your 25Live instance is configured.
Across the next sections, you may see choices for categories, requirements, calendars, comments, and notes depending on how the Event Form has been customized for your institution, 25Live instance, and security group.
 Image: Use the Publish to Calendar options to set up this event in 25Live Publisher.
- Categories: Select the categories the event belongs to. Categories help other users find events when searching, and can determine if your event displays on web calendars
- Categories can be inherited from a folder in your event structure
- Requirements: Use the toggle to add pertinent requirements, such as a liquor license or a contract, and add comments or quantity information as needed
- Calendars: If you are promoting your event on one or more web calendars, choose the calendar(s) here, and enter comments as needed
- Comments and Notes: Enter appropriate comments and/or notes for the event, and keep important information at the top
- Event Comments can be seen by most users
- Confirmation Notes are shown in Confirmation Reports
- Internal Notes can be seen only by people who are event contacts, like the Requestor and the Scheduler
Note: Comment and Notes Fields are Limited
Comment and notes fields are limited to approximately 32,000 characters. To prevent truncated text:
- Summarize email conversations rather than copying entire email threads into comment fields
- Limit or omit long HTML code insertions
11. Choose an Event State
Choose the appropriate state of your event. A few notes about event states (for more details, see Choosing an Event State):
- You have the option to set your chosen event state as your default for creating new events
- You may be required to save your event as a Draft, in which case any locations and/or resources you’ve requested will be saved as preferences, not assignments
- Tentative and Confirmed events can have assigned locations and resources
- The Denied, Cancelled, and Sealed event states are not available for new events and cannot be set as your default event state
If you're the event Scheduler or Requestor and you're able to save your event in a Tentative or Confirmed state, you become the event owner, with the right to edit, copy, or delete the event (unless a senior scheduler takes ownership of the event).
12. Agree to Terms and Conditions
Check the agreement box. You must agree to your institution's terms and conditions (if presented) before your event can be saved.
Reminder: You May Not See All Sections
Your event creation environment may not include all the sections and fields mentioned, depending on how 25Live has been set up for your instance and security group.
13. Select a Heading
 Image: Example of heading choices. The options will differ in your 25Live instance.
If your 25Live instance is set up to require it, you will need to choose the appropriate heading for your event. The heading determines the context for event storage (the cabinets and folders set up by administrators) and the access rights to the event by various 25Live security groups.
If you select “I Don’t Know,” your event will be saved as a Draft, and location and resource assignments will be removed but saved as preferences until the Draft state is changed.
Tip: Preview Your Event
The Preview button is available to see a summary of your event at any time, except during saving. The preview also allows you to jump to different Event Form sections to edit information and settings.
14. Choose Post-Saving Options
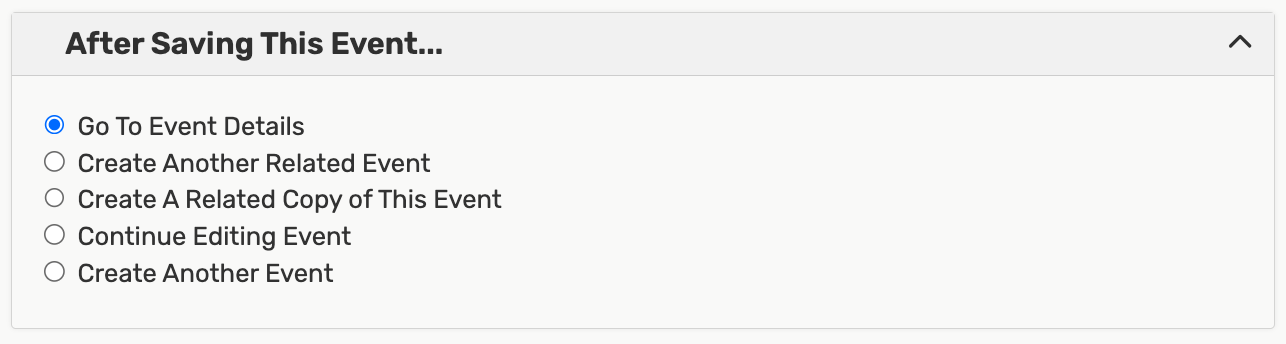 Image: A number of options are available after you save your event.
Convenient options are presented to allow you to choose your next action after saving your event in the After Saving This Event section.
- Go to Event Details (see Viewing Event Details)
- Create Another Related Event (see Creating Related Events)
- Create a Related Copy of This Event (see Copying Related Events)
- Continue Editing Event (see Editing Individual Events)
- Create Another Event
15. Save Your Event
Use the Save button to complete event creation. Depending on your instance or whether you are using the mobile app or browser, you may see other options:
- Cancel - Exits the form without saving any of your entries. Use with caution.
- Preview - Shows a summary of your entries in a more compact view.
- Silent Save - Prevents event save emails from going out upon save.
Warning: The Cancel Button Will Not Save Changes
The Cancel button is always available at the bottom of the Event Form alongside Preview and Save, but be aware that using Cancel will not save any completed fields or changes.
Additional Tips
- When you submit an event with a location or resource that you don't have permission to assign, the Event Preferences area in the Occurrences area of the event details view lets you know that the assignment has been saved as a preference and an assignment task request has been issued for the item.
- When you save an event in the Draft state, any location or resource assignments are saved as event preferences only. The locations or resources themselves are released for other assignments.
- The event reference number is displayed when the event is saved. You can use this later to quickly find the event.
Note: Other Events Creation Methods
A 25Live Outlook Integration is available to create 25Live events using Microsoft Outlook.
Keep multiple events, from one or more Google Calendars, in sync with 25Live using the 25Live Google Calendar Sync Service.